Art Tool Tips
Review the step by step instructions below or scroll down to view a short video
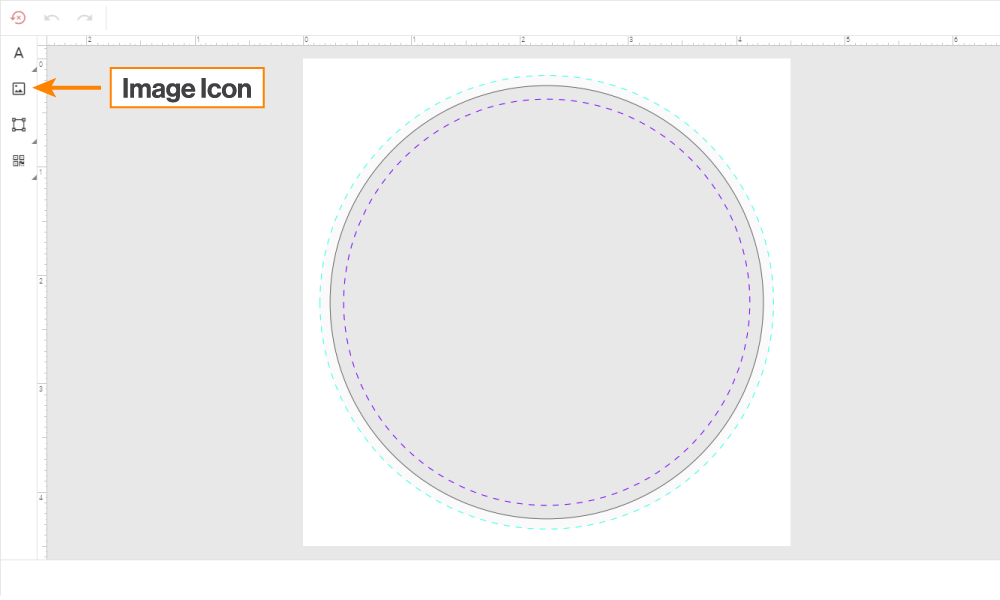
1. Once you have launched the design tool, click the image icon on the left side of the screen.
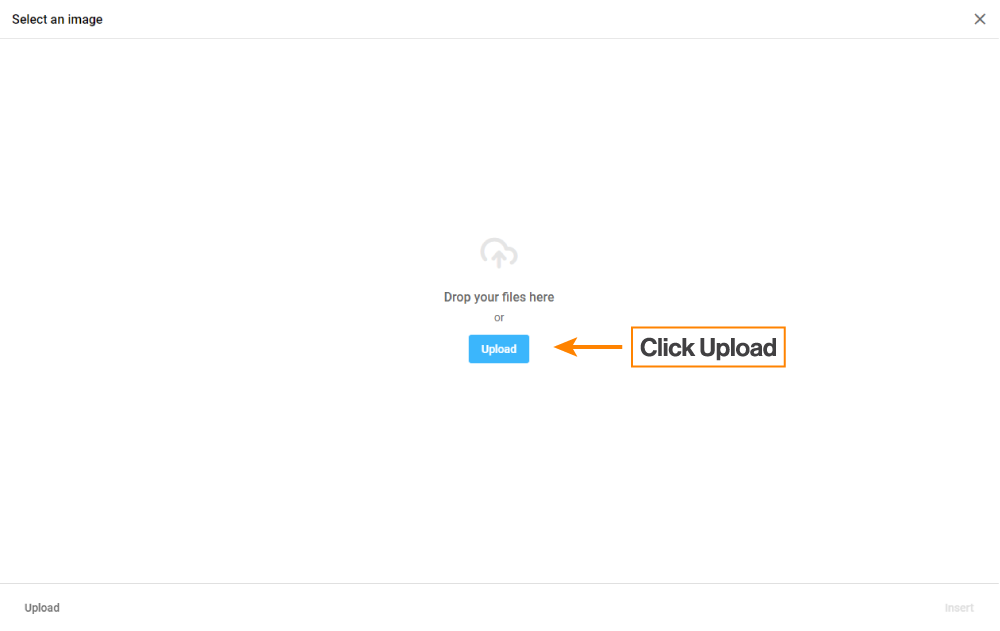
2. A new window will appear. Click the blue “UPLOAD” button to browse your computer files or simply drag and drop the file into the tool.
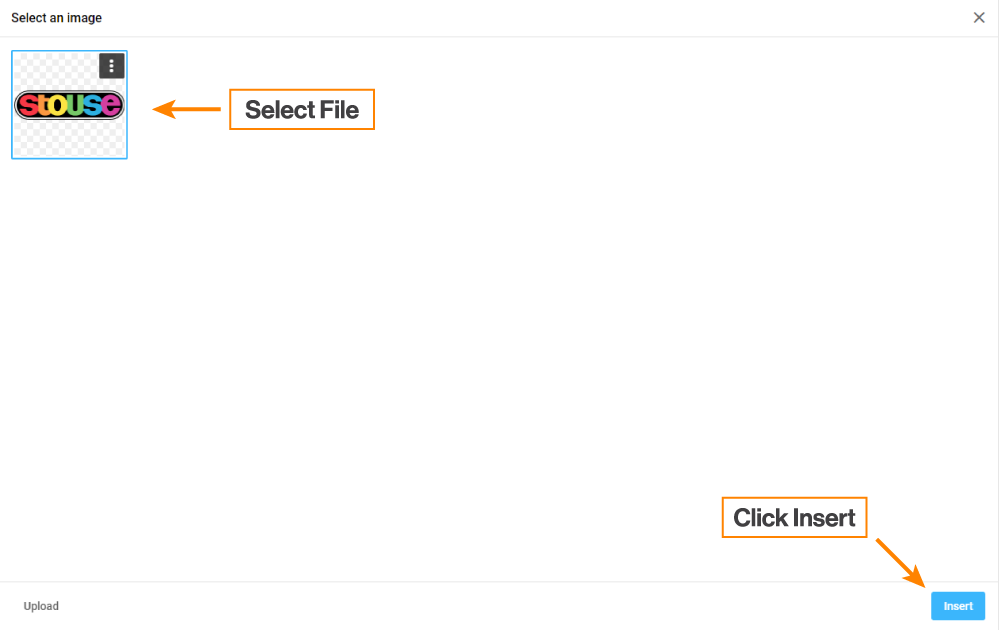
3. After selecting your file, it will appear in the window. Click the newly uploaded image to select it and hit “insert” in the bottom right corner.
Video instructions
Review the step by step instructions below or scroll down to view a short video
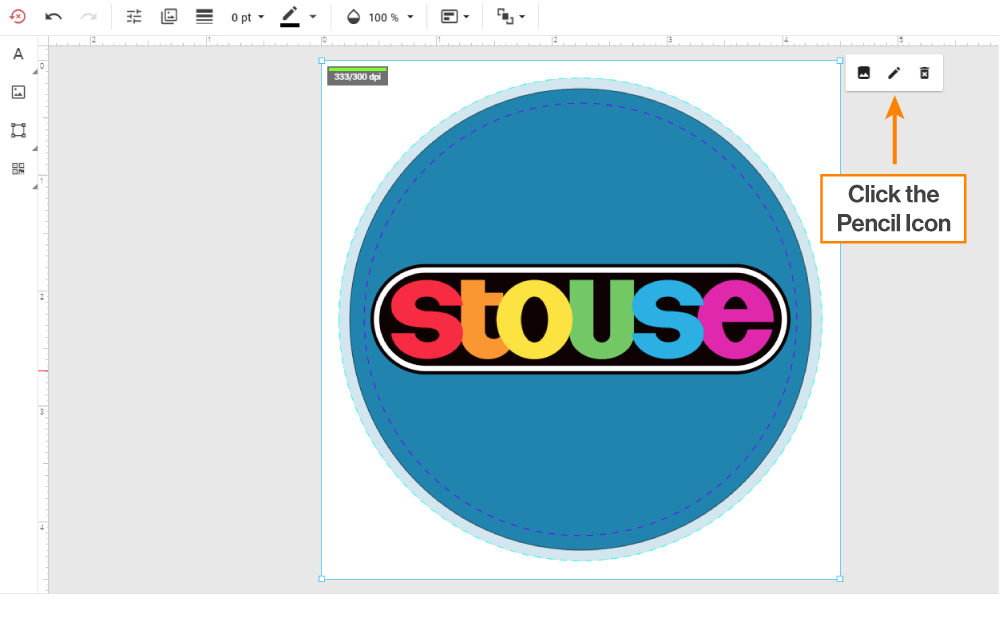
1. After you’ve uploaded your image in the design tool, click the pencil icon above the image to launch the image editor.
2. Once you’re in the image editor, select background from the bottom left.
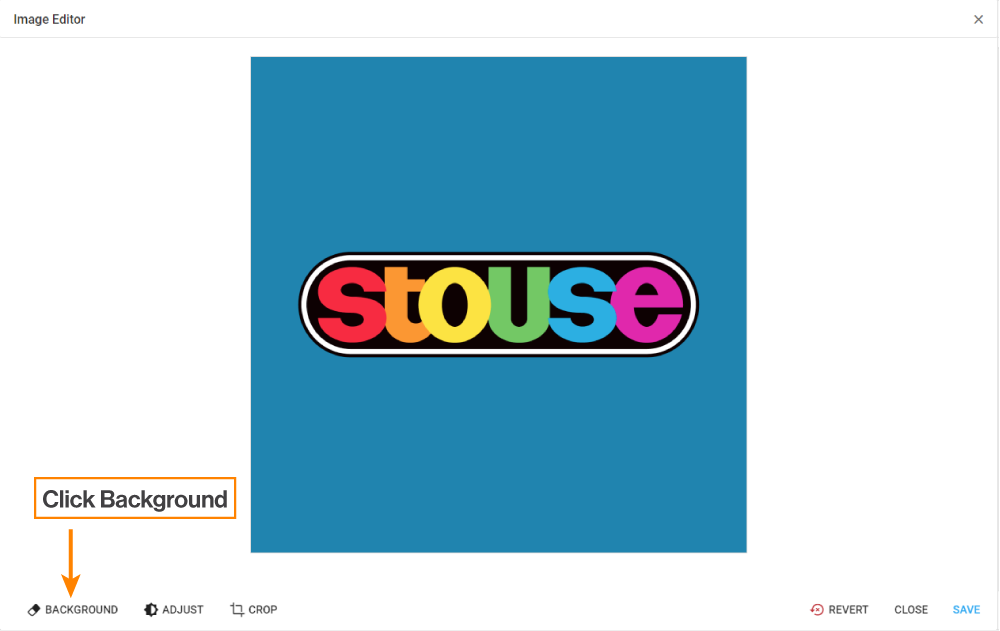
3. There are a few options along the bottom
a. Choose background – this is the color you want behind your image. When you remove color from the image, this background color will show up in its place.
b. Tolerance – adjusts how strongly colors may differ from the selected color.
c. Contiguous – check this box to make the enclosed area where you click transparent. Uncheck the box to remove a clicked color on the whole image.
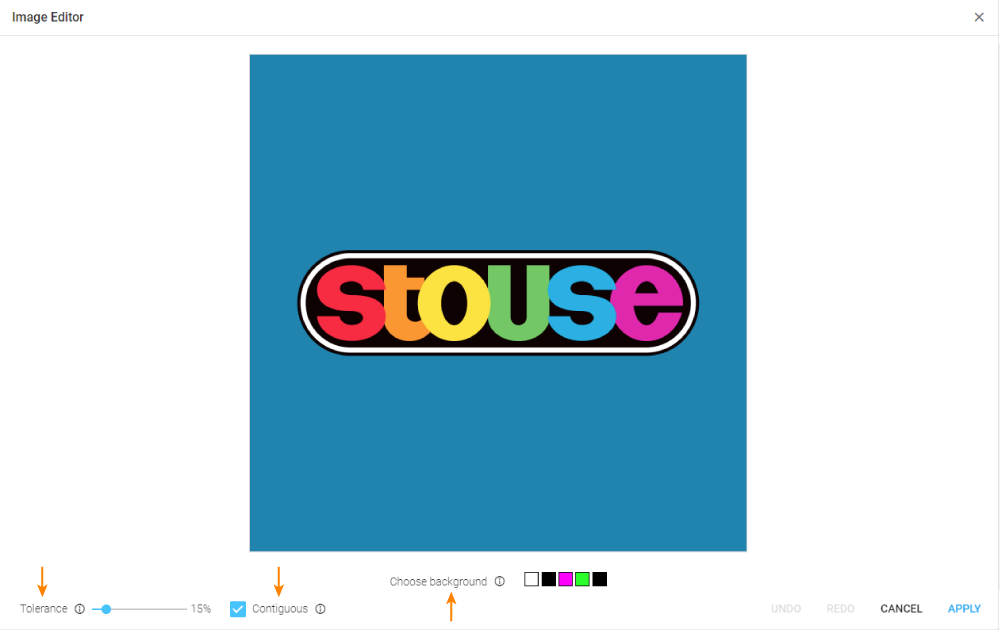
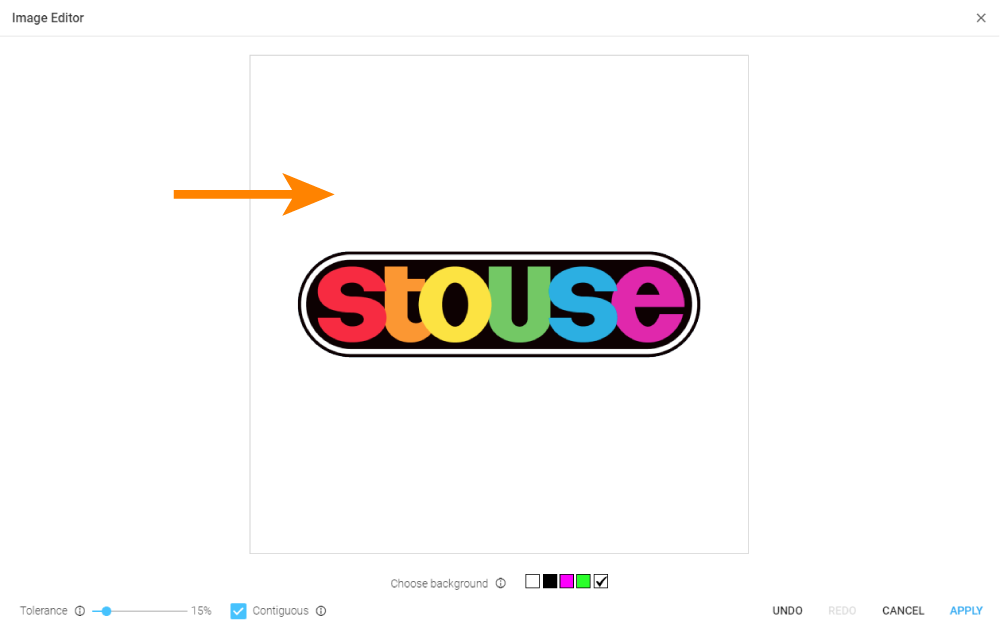
4. Once you’ve made your selections, click the area you want to remove. Below, the user clicked on the darker blue background to remove the color from that area and show white in the background in its place.
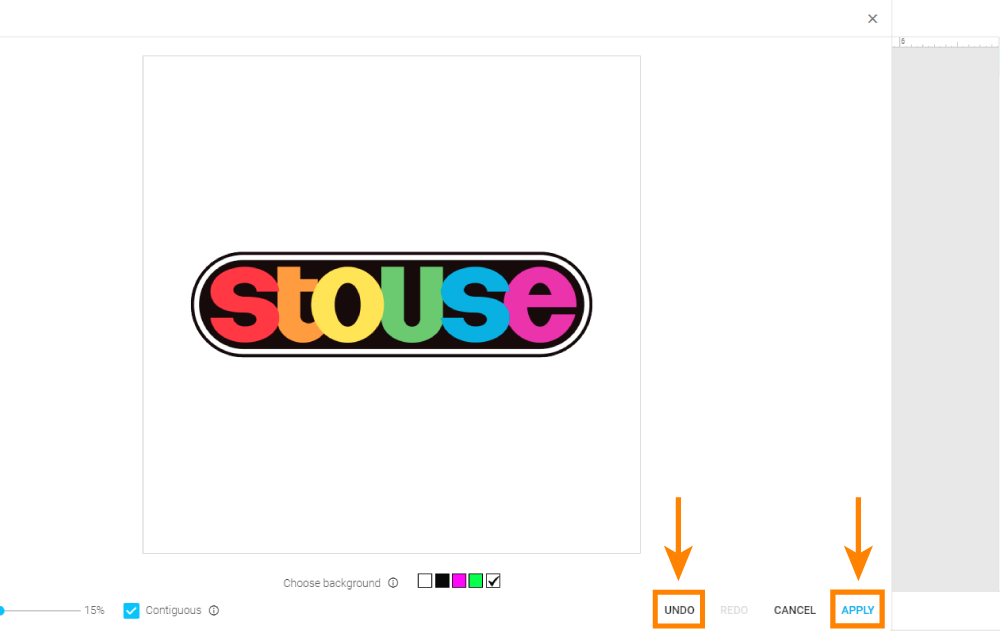
5. If you don’t like the change, or make a mistake, simply click the undo button in the bottom right of the page. Once you are happy with your changes, click apply in the bottom right of the page.
Video instructions
Review the step by step instructions below or scroll down to view a short video
1. After you’ve uploaded your image in the design tool, click the pencil icon above the image to launch the image editor.

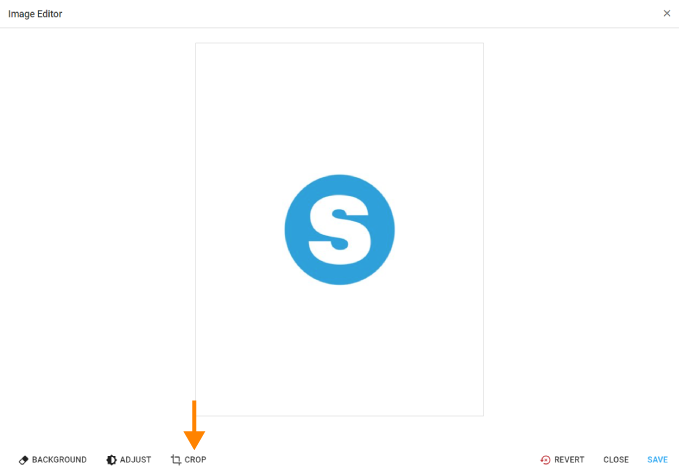
2. After opening the image editor, select the “CROP” option at the bottom of the window.
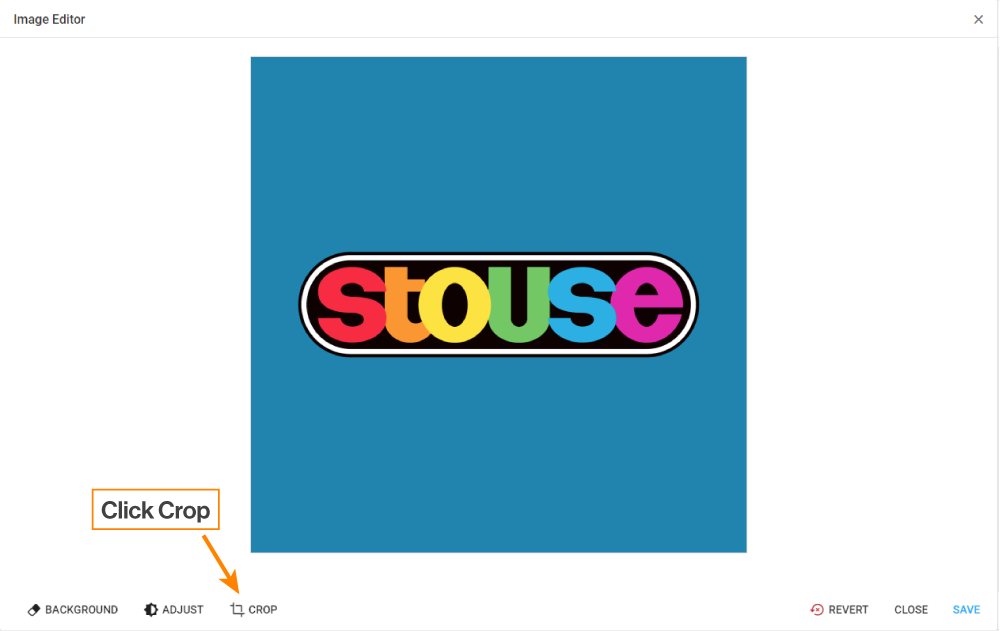
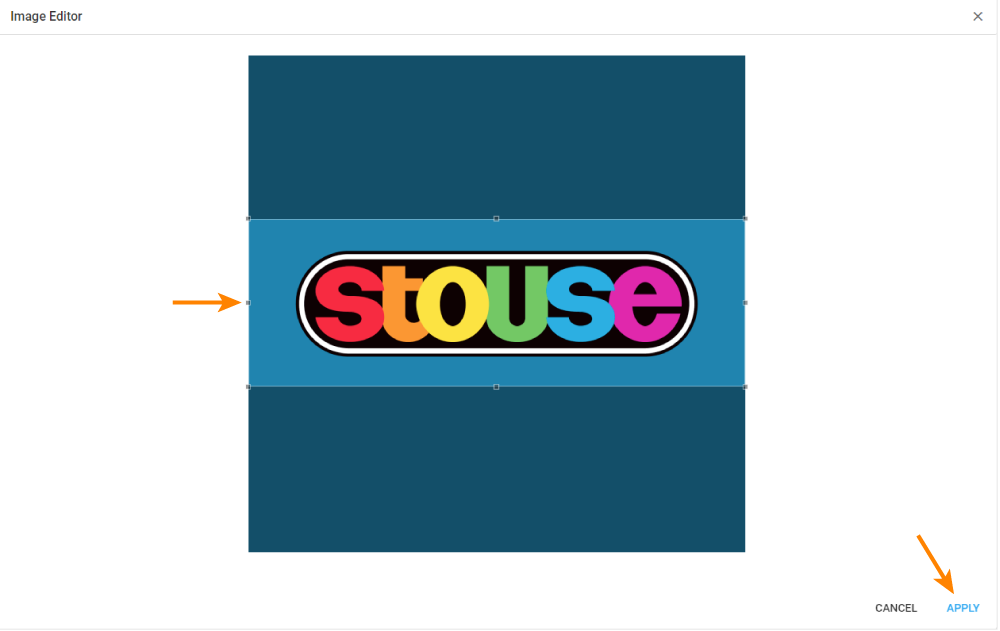
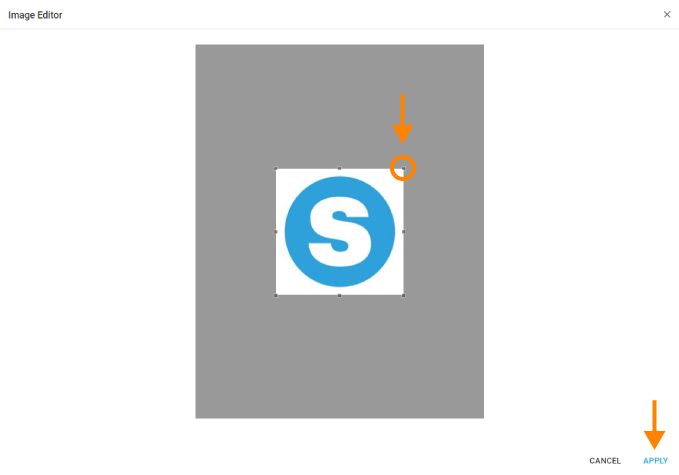
3. Click and drag the corners of the box to make your selection. The area shown inside of the box will be all that remains after cropping. When you have made your selection, hit “APPLY” in the bottom right corner.
4. If you are unhappy with your crop, you can hit “REVERT” to undo the change. If you are satisfied with the change, hit the “SAVE” button.
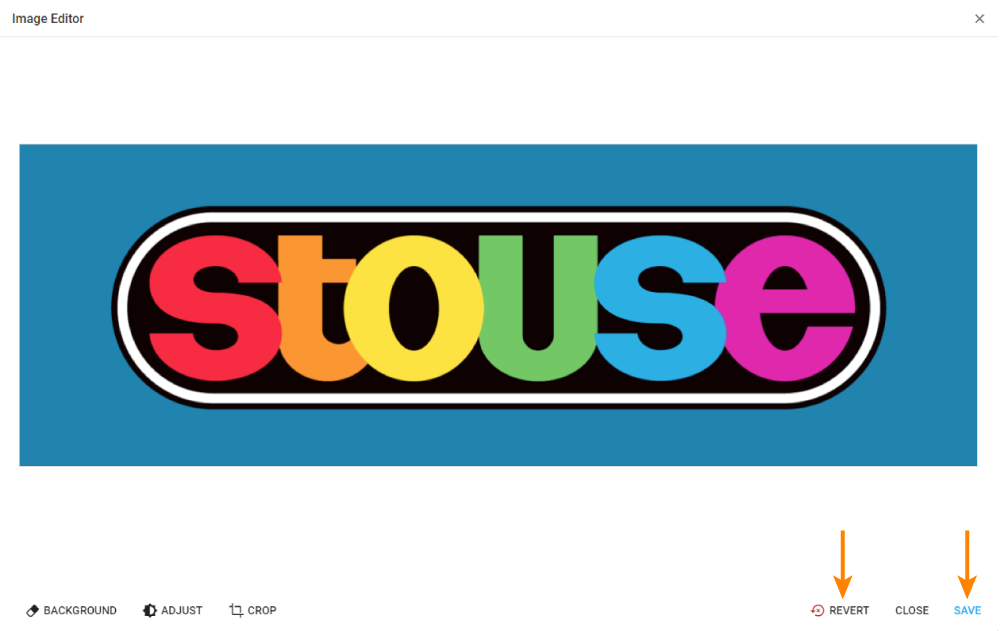
5. Your crop is now complete.
Video instructions
Review the step by step instructions below or scroll down to view a short video
1. After uploading images and adding text layers to a template, you will sometimes need to reorder the layers to ensure that all of the elements show up properly. You can view your layer order to the right of the art tool.
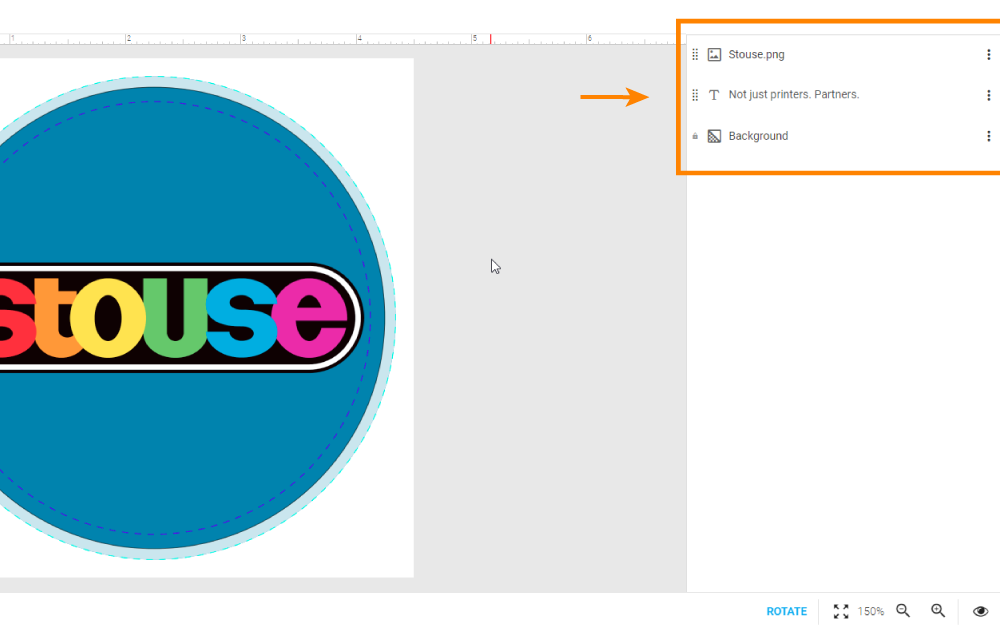
2. If you notice a layer that is not showing properly, you may need to move it to the top. In the layer menu, you will notice a symbol containing 8 small dots to the left of each layer. Click and drag the symbol up and down to reorder the layers.
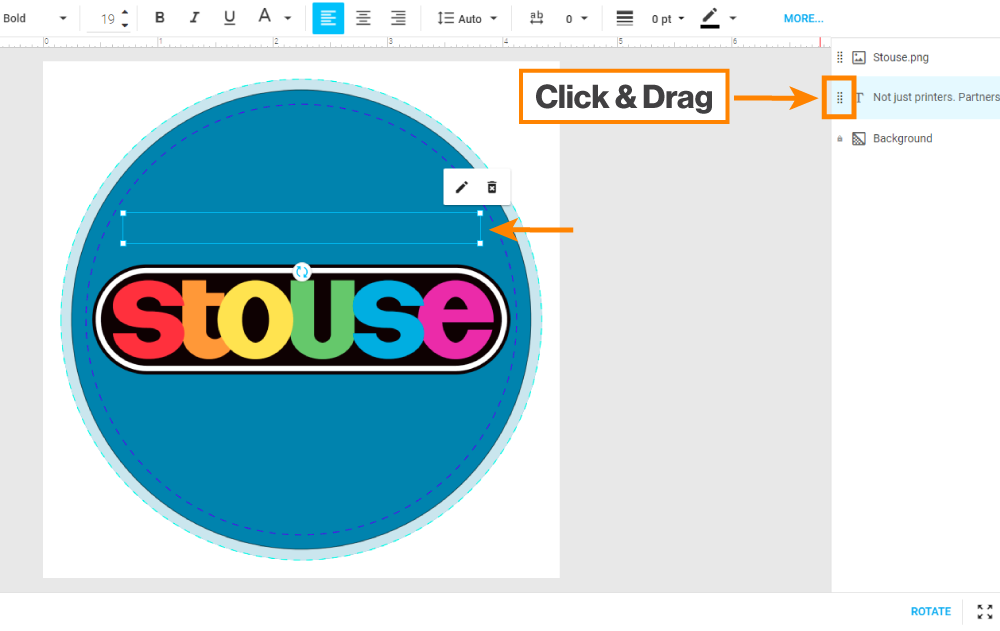
3. Once you have moved the hidden layer to the top of the list, it will show up on the template.
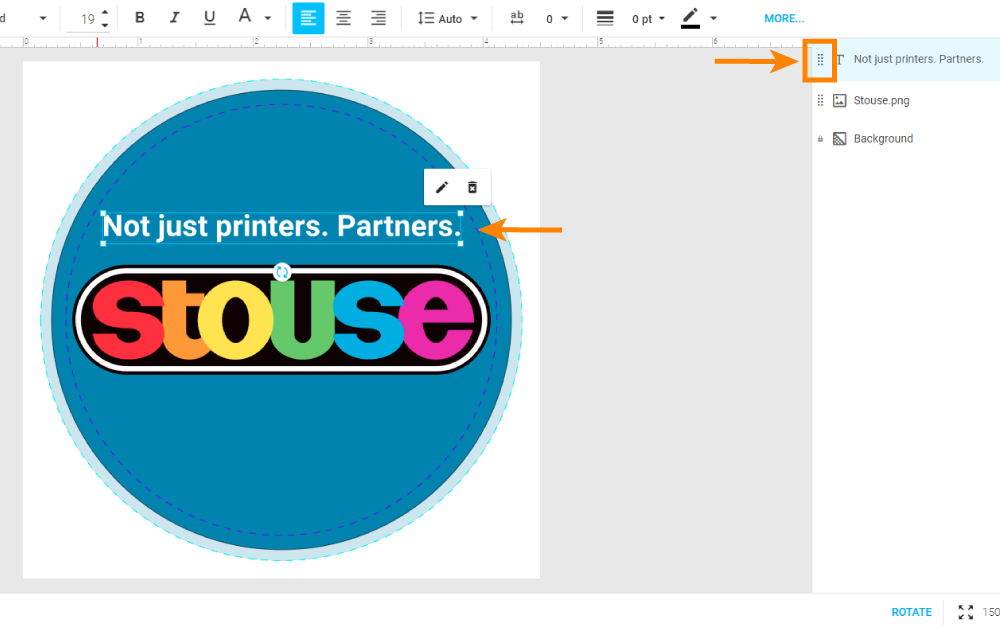
Video instructions
Review the step by step instructions below or scroll down to view a short video
1. Select the QR code icon to the left of the design tool.
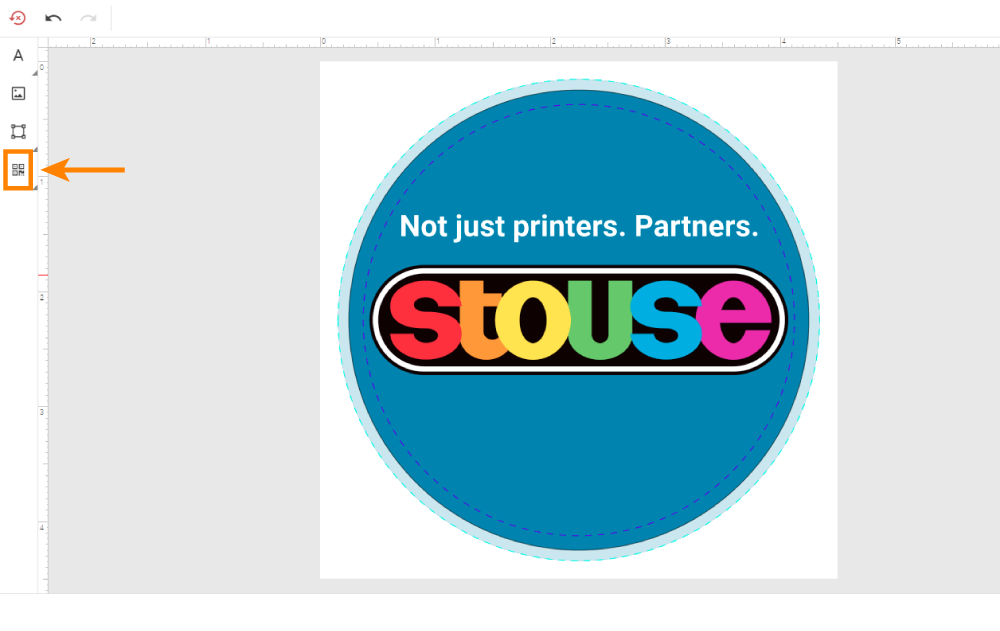
2. A menu will pop out and allow you to select either a barcode or a QR code.
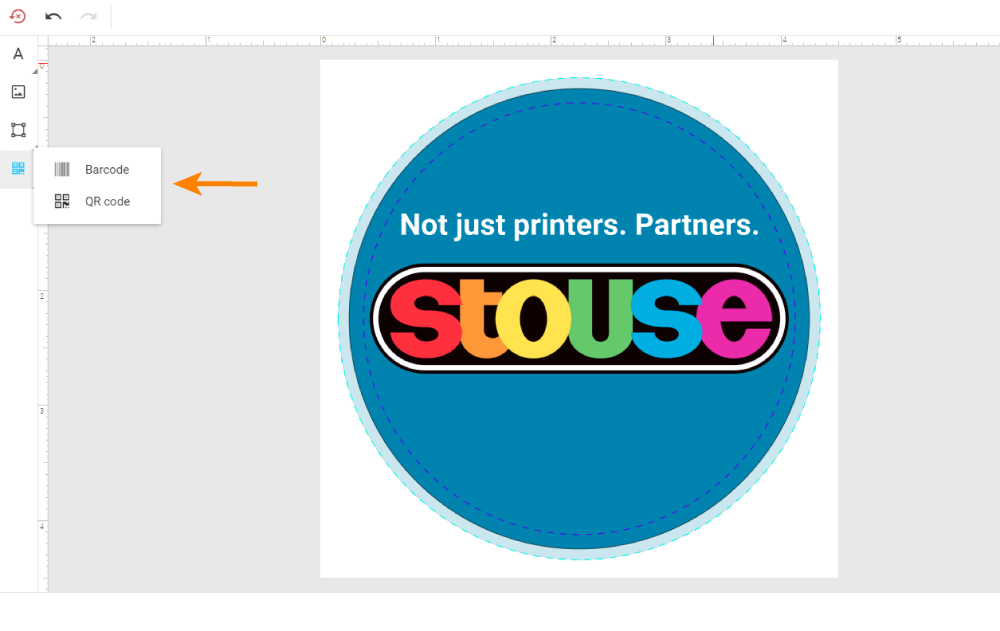
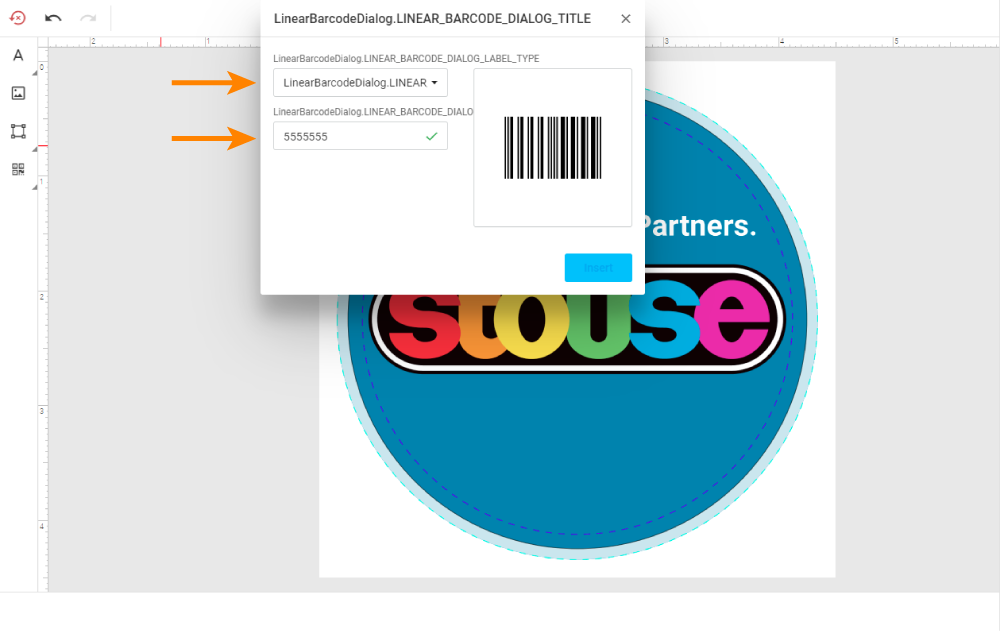
3. If you select barcode (for QR code, see step 5) you will get a pop up like to the image below. You will then need to select the type of barcode you would like to create and enter the corresponding code you wish to connect. After doing so, you can hit “INSERT” to add the barcode to your artwork.
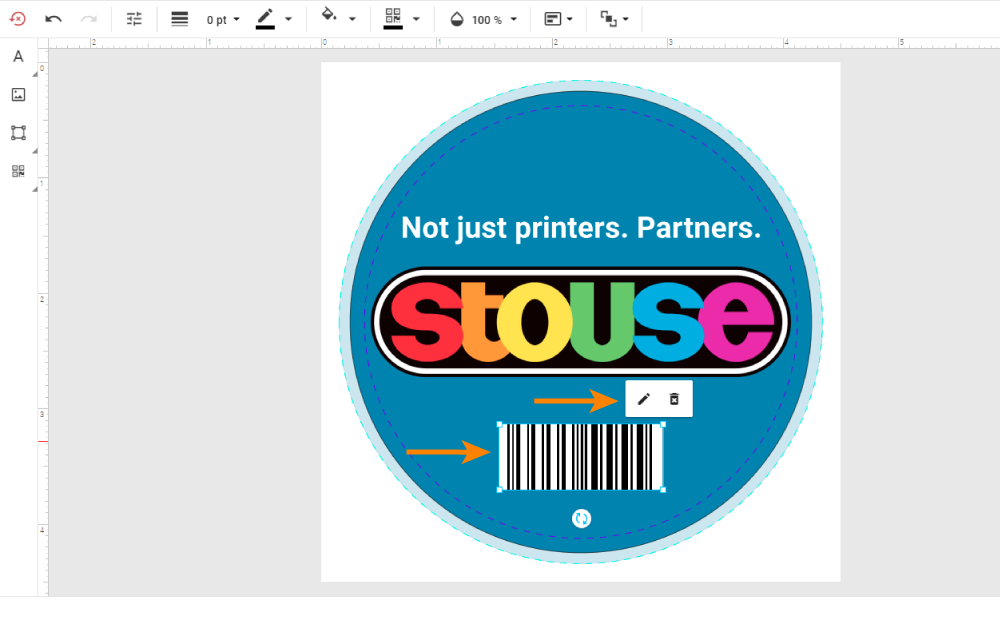
4. After inserting the barcode, you will now have a scalable image that you can position however you like within the artwork (you can edit the barcode information by hitting the pencil icon in the window above the barcode).
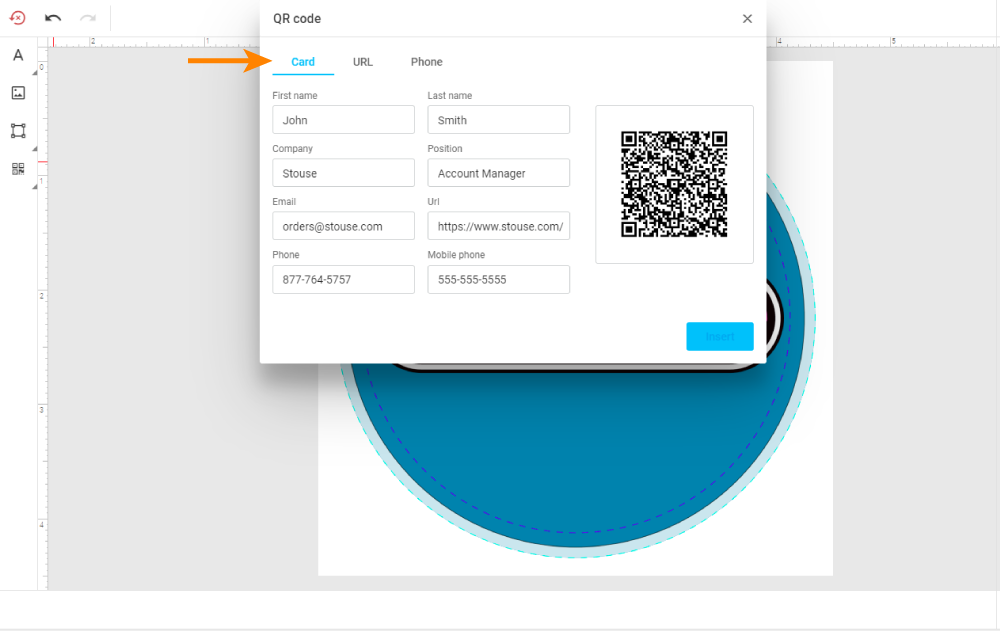
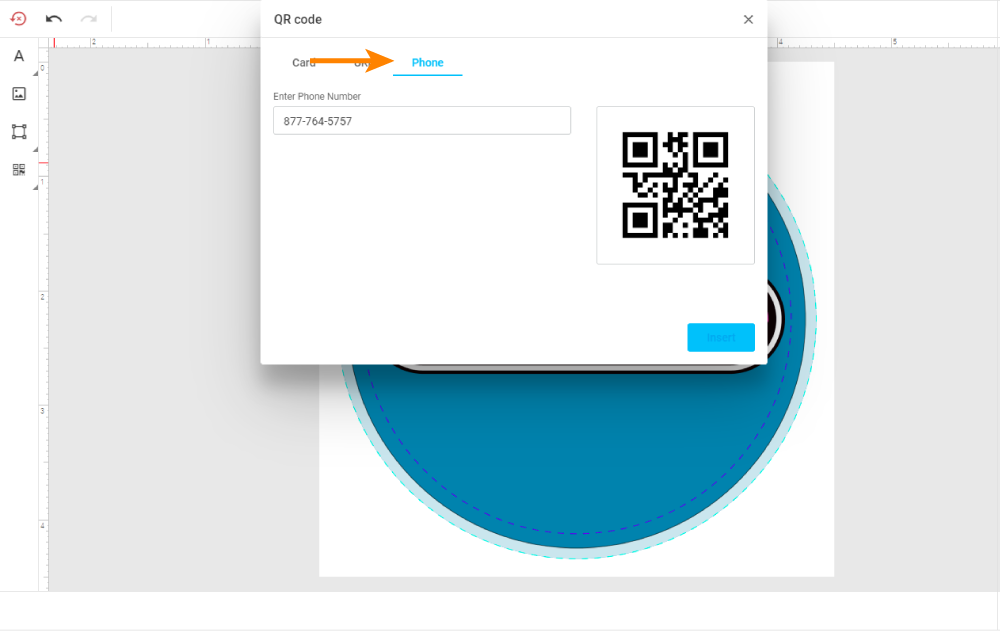
5. To insert a QR code, choose the option in the pop-out menu shown in step 2. You will then see a QR code display window that offers 3 choices for adding different information to the code. Below you will find a breakdown of each option and a photo example of each instance (you can scan the codes with your phone’s camera to see how each of them reacts).
- Card: This option allows you to enter business card information. It will trigger a new contact in the viewer’s phone.
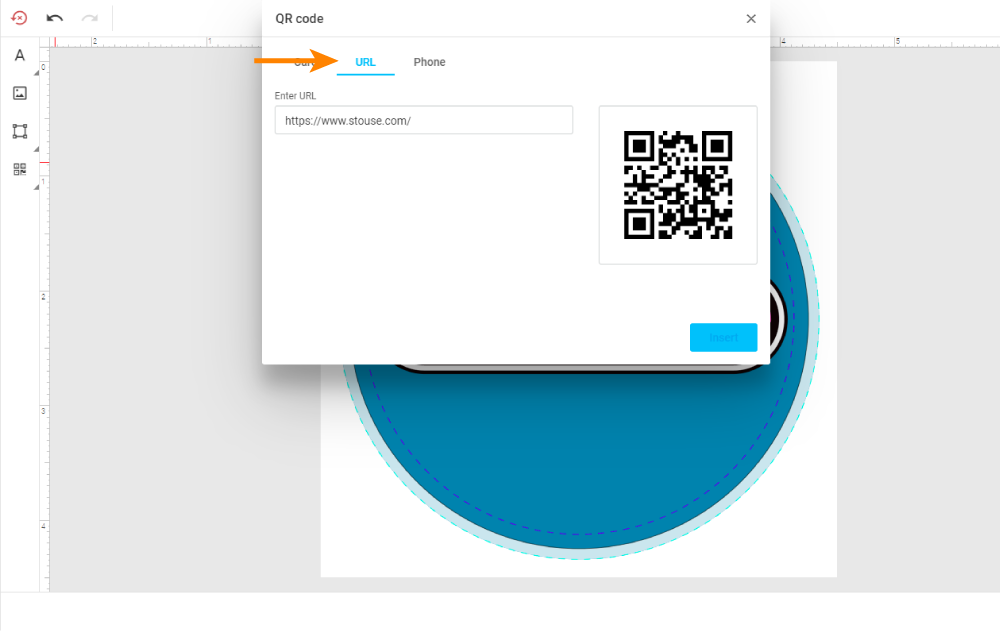
- URL: This option is for linking directly to a website. Simply add the web address and viewers will be prompted to view the page.
- Phone: This option is for making it easier to connect. You can add the phone number you want to be reached and the viewer will receive a prompt to call that line directly. After entering the relevant information, just hit the blue “insert” button to add it to your art file.
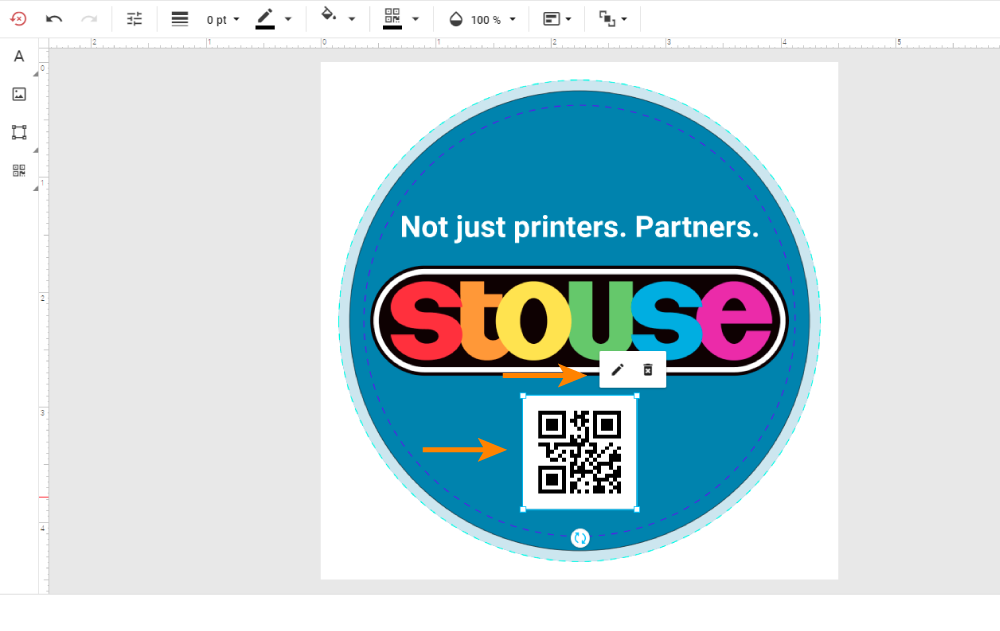
7. After inserting the QR code, you will now have a scalable image that you can position however you like within the artwork (you can edit the code information by hitting the pencil icon in the window above the code).
Video instructions
Review the step by step instructions below or scroll down to view a short video
1. With your shape or text selected, click the select fill color icon or select text color icon in the top menu.
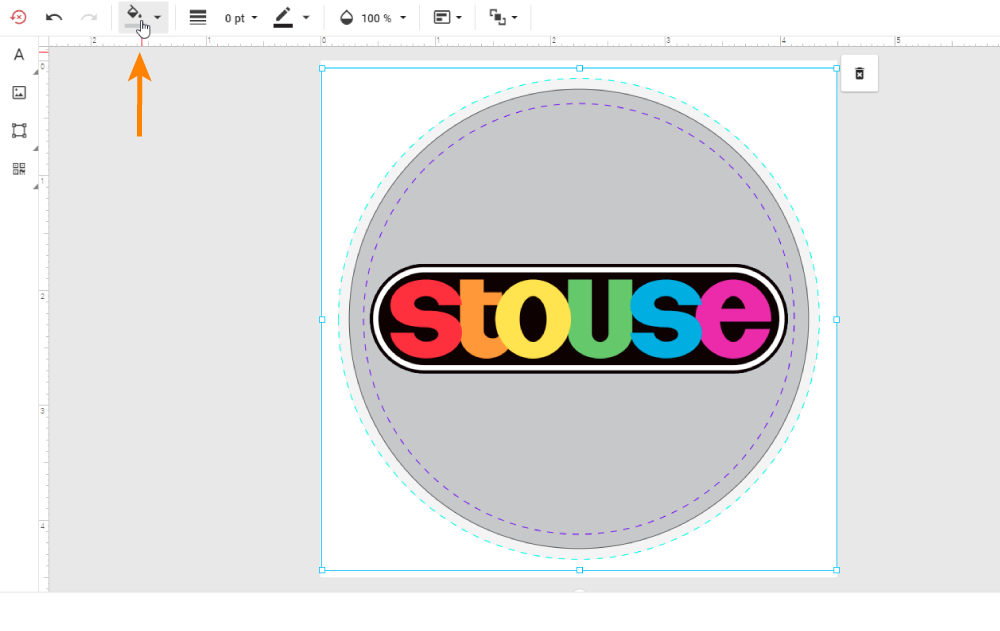
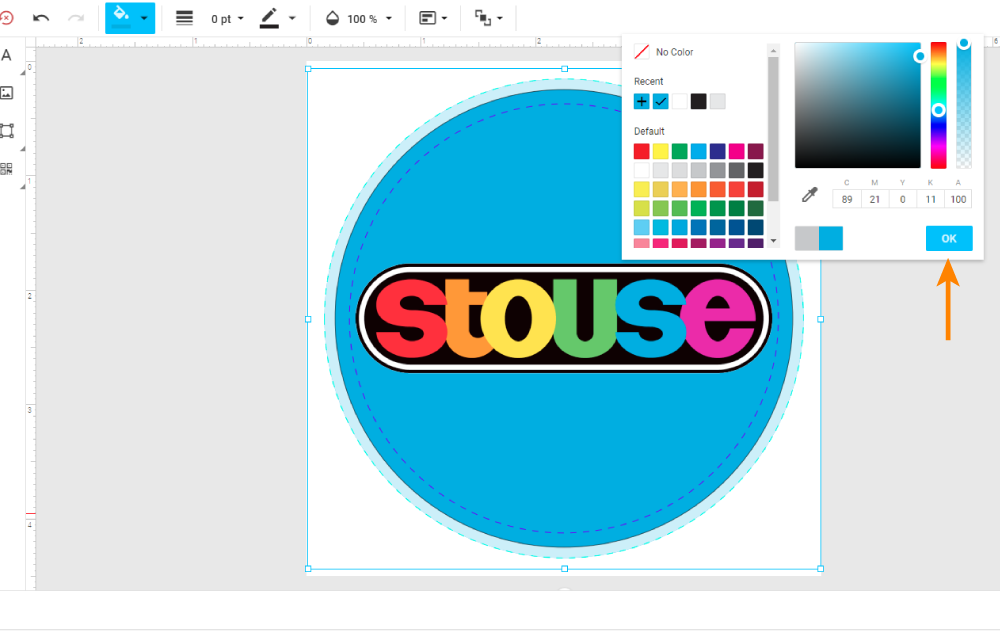
2. A window of color swatches will appear. Select the eye dropper tool towards the middle of the window.
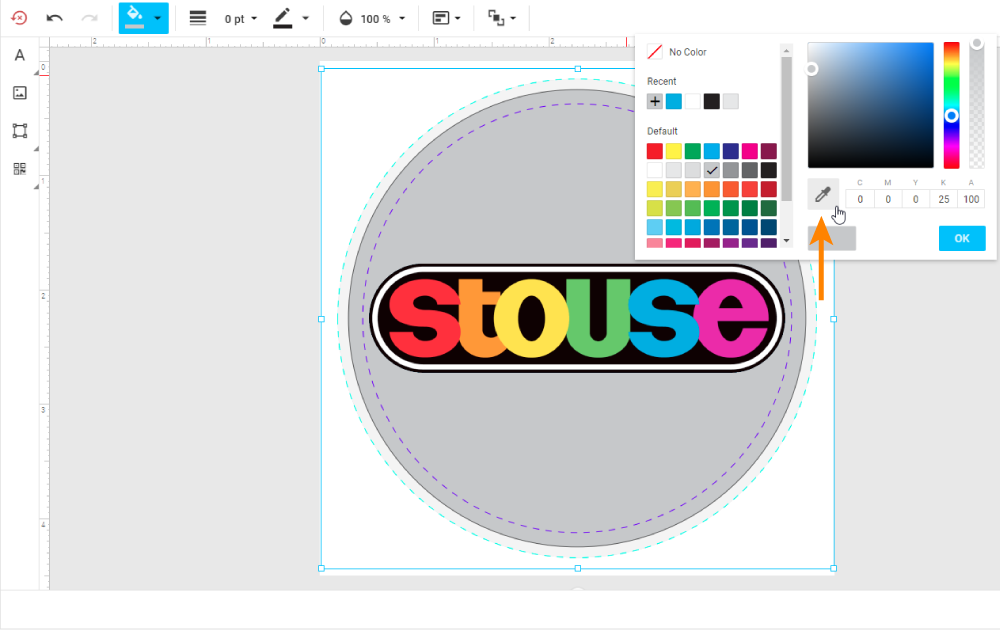
3. A crosshair cursor will appear with a circular window zooming in on individual pixels. Use this to select a color in your art that you would like your selected object to match.
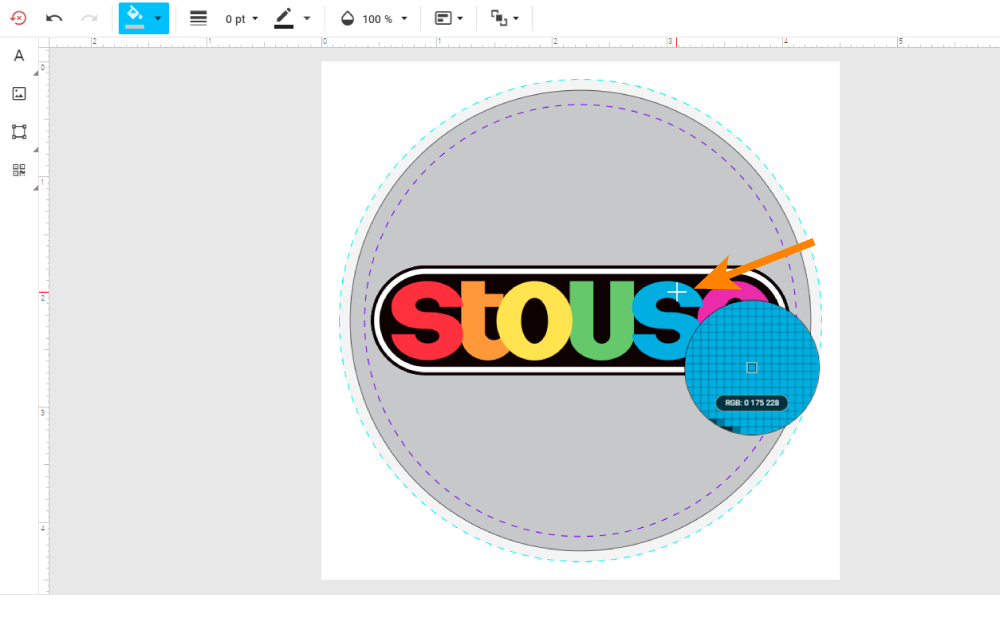
4. Once you select a color, click “OK” in the color swatches window. Your color selection with the eye dropper tool is now complete.
Video instructions
Review the step by step instructions below or scroll down to view a short video
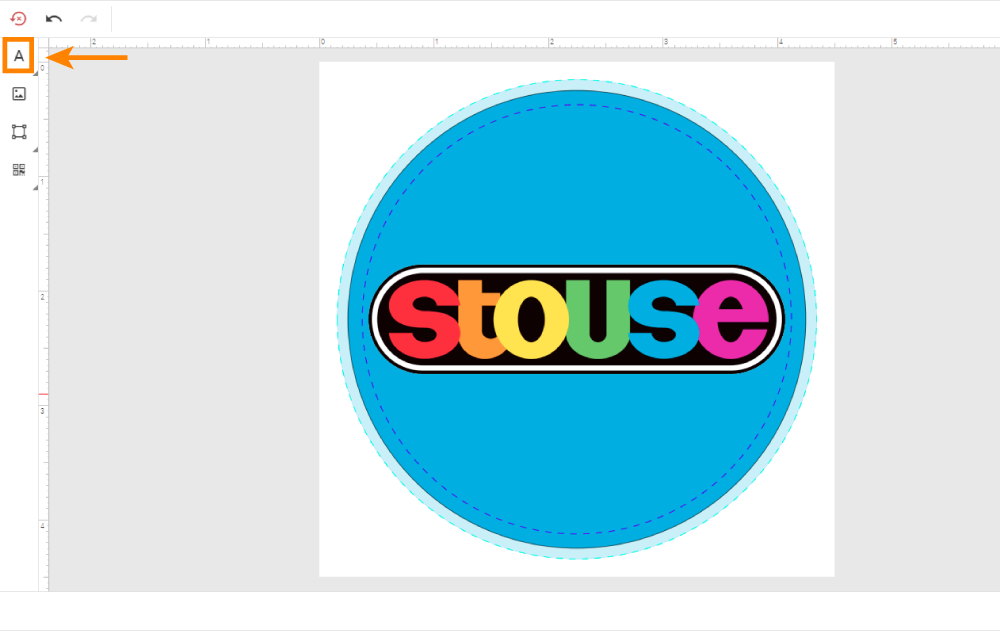
1. Click the text icon on the left side of the screen.
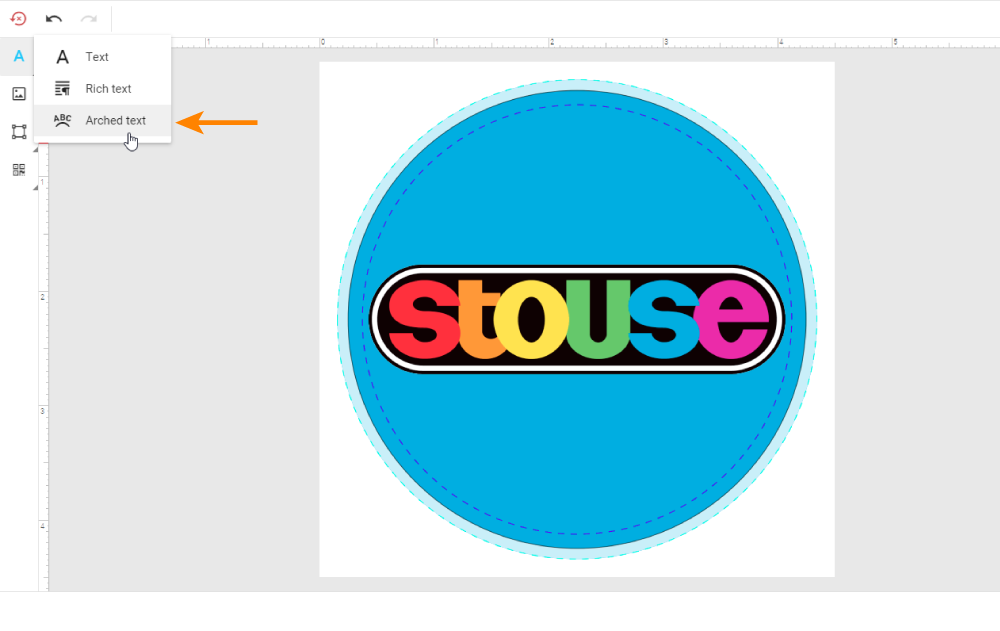
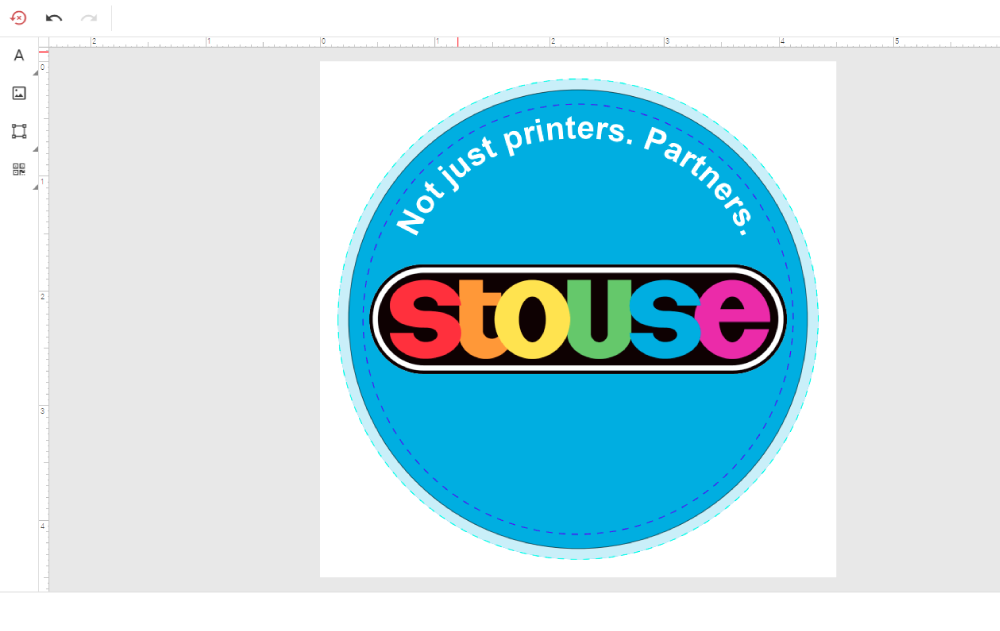
2. Select the arched text option.
3. After selecting arched text, a text box will appear in the middle of your design. Delete the placeholder text and add your own verbiage. Then adjust the font, size, and placement to the way you want it. Once the text is placed where you like it, select the arched text bend tool in the top menu.
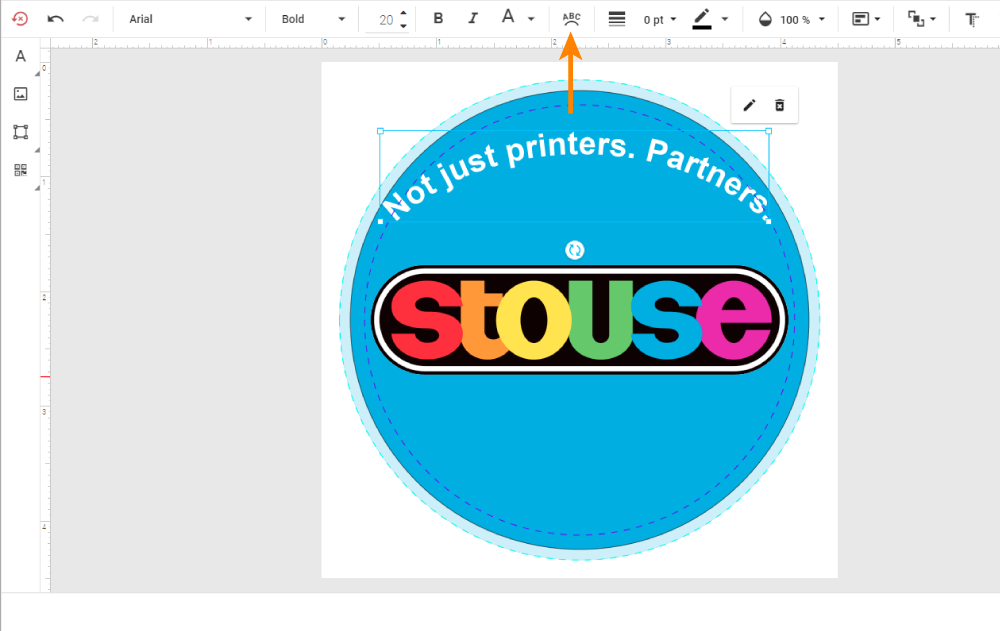
4. A sliding scale will appear with a blue dot. You can slide this blue dot up and down the scale. Below you will find a breakdown of how the sliding scale works.
- The horizontal line in the middle of the scale will create a straight line of text.
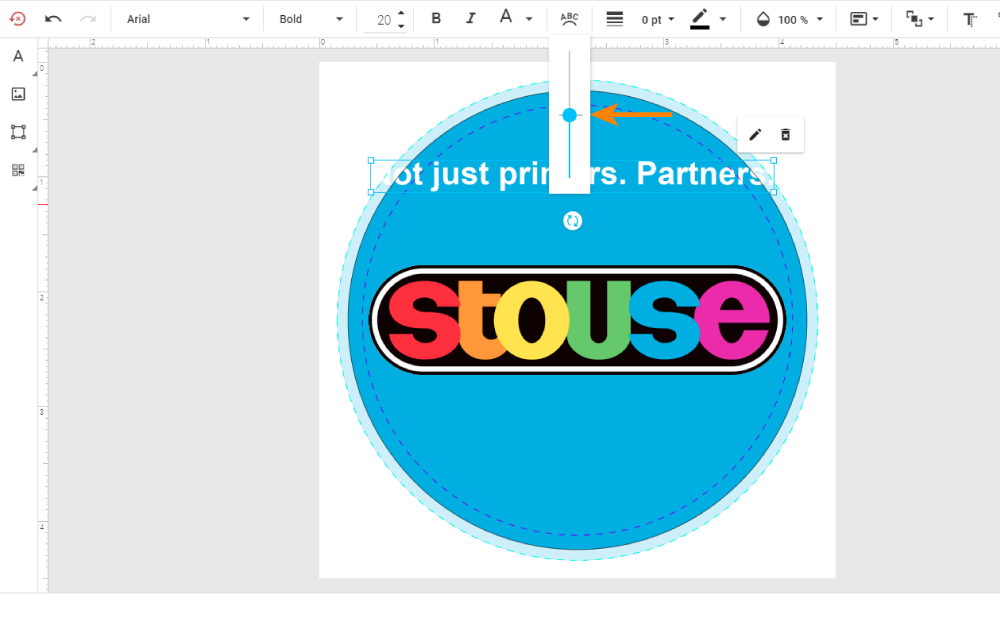
- The farther up the scale you move the blue dot, the more the text will curve upwards.
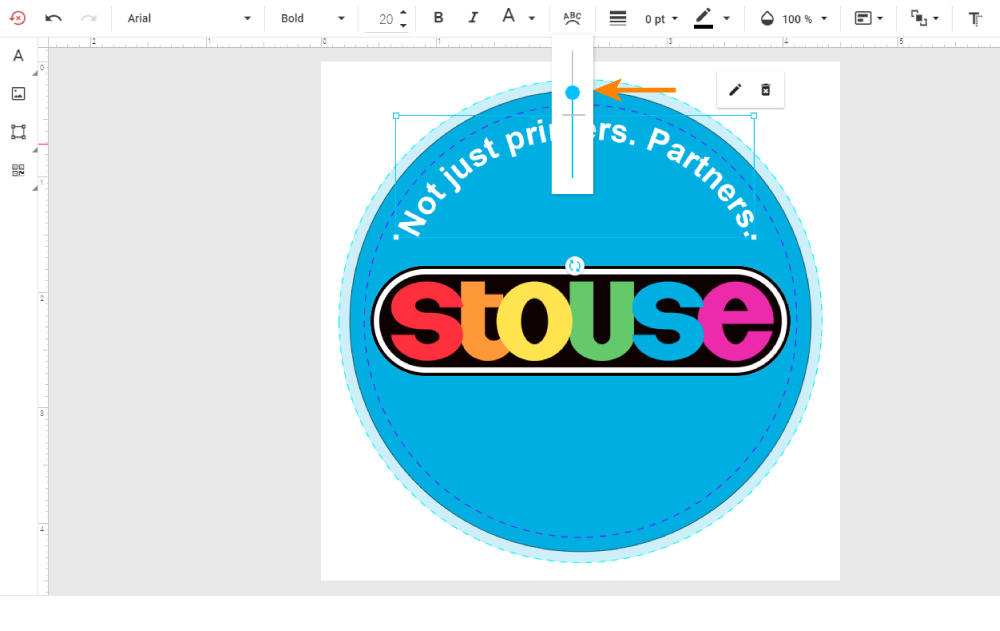
- The farther down the scale you move the blue dot, the more the text will curve downwards.
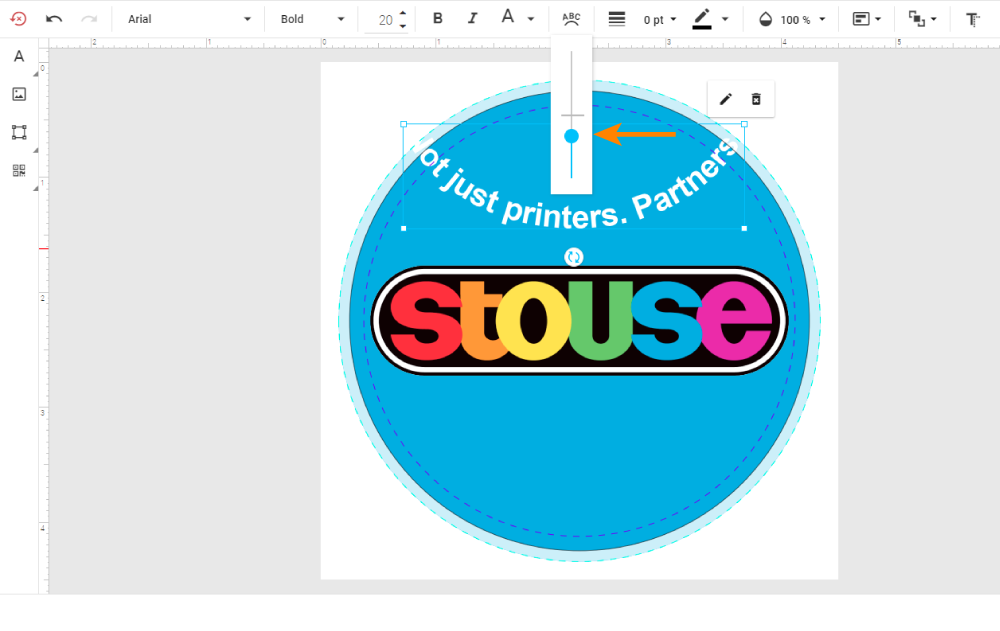
5. Adjust the slider to your liking, and your arched text is now complete.
Video instructions
1. Select the layers that you would like to group together. You can do this by holding down the shift key on your keyboard and clicking on each layer name or design element in the design tool.
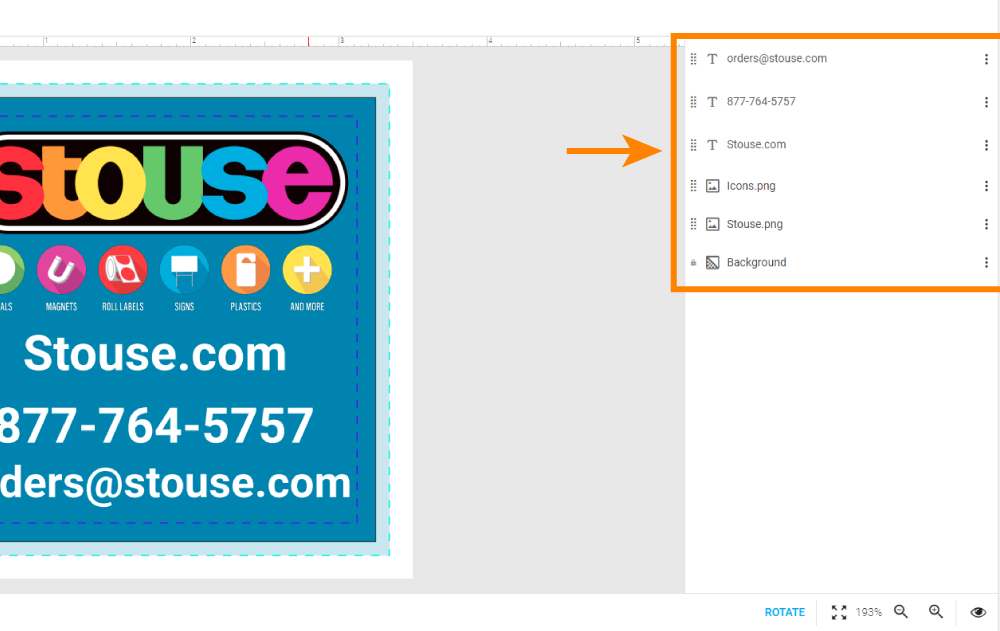
2. Select the layers you want to group by holding down the shift key and clicking each layer. Then hit the “MORE” button in the top menu bar.
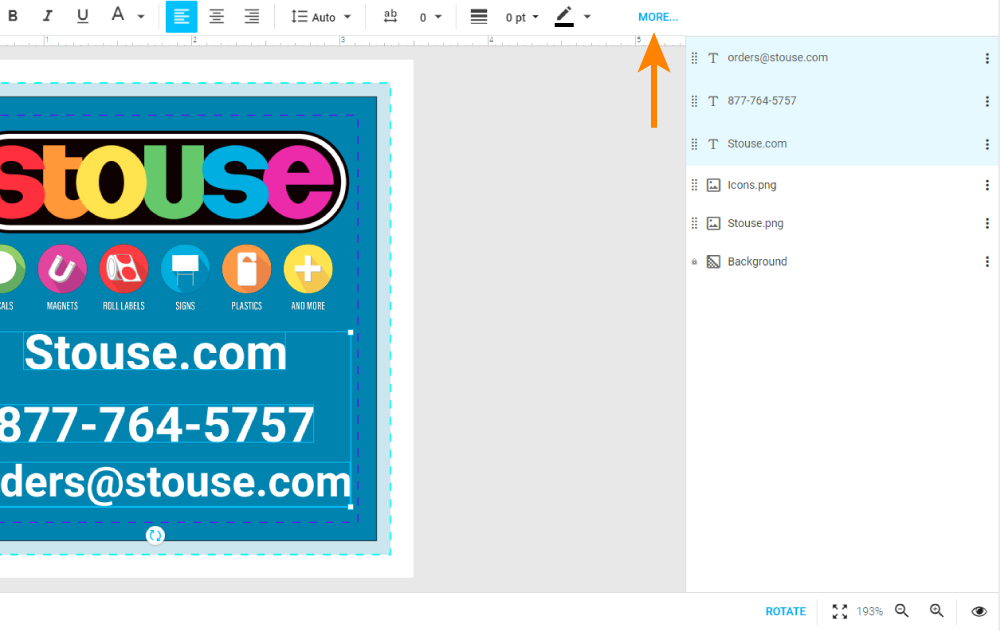
3. Additional menu options will appear. Click the group icon.
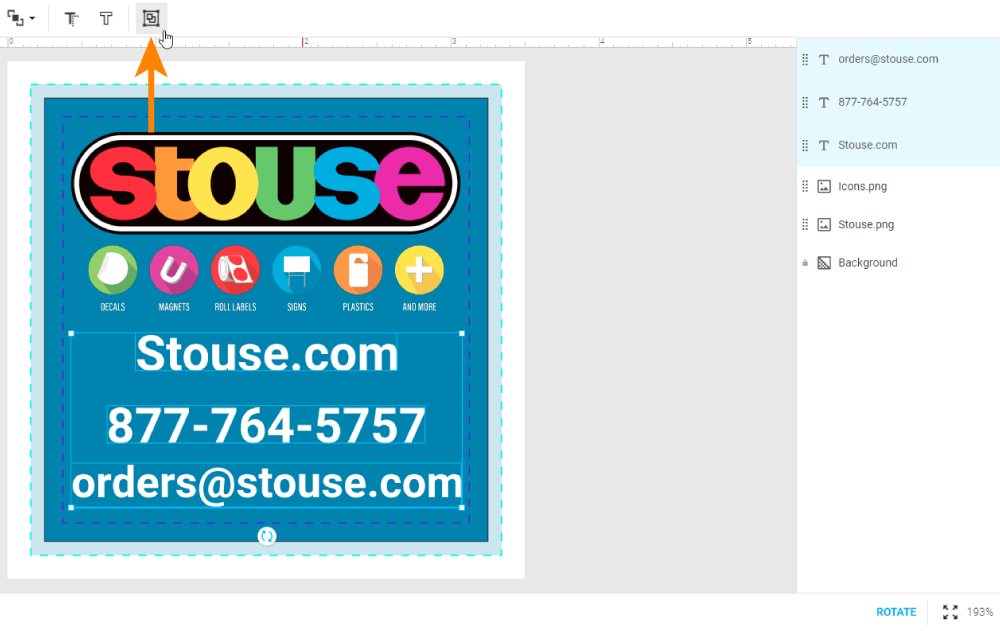
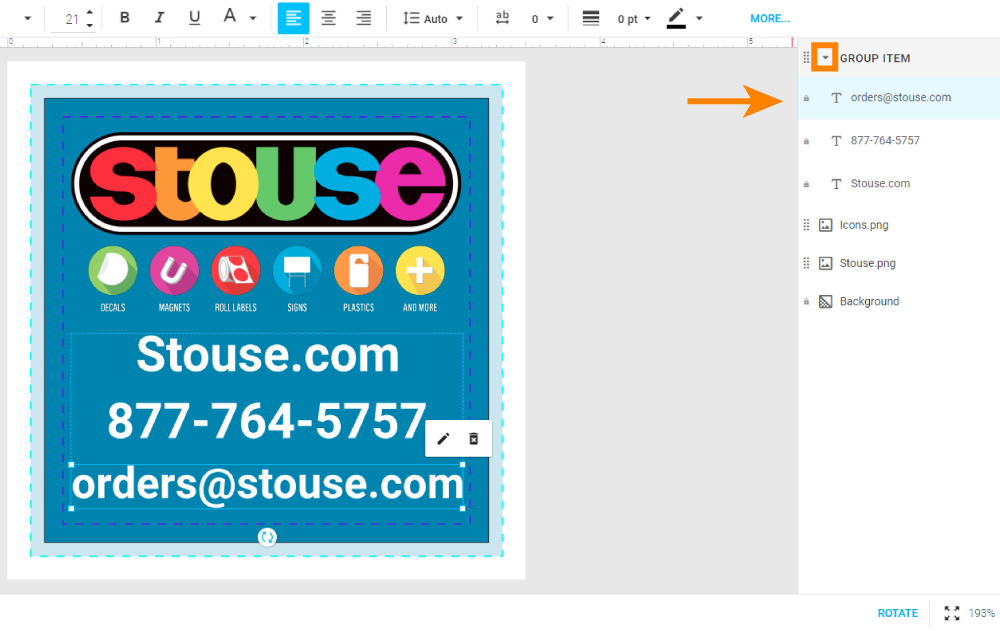
4. The previously selected layers will now be combined into a single grouped layer. You can view the individual layers by clicking the small arrow to the left of the layer name. If your layer order has been changed, you can make adjustments by using the 8 small dots on the left side of the layer name to drag the layer up (forward) or down (backward) in the list.
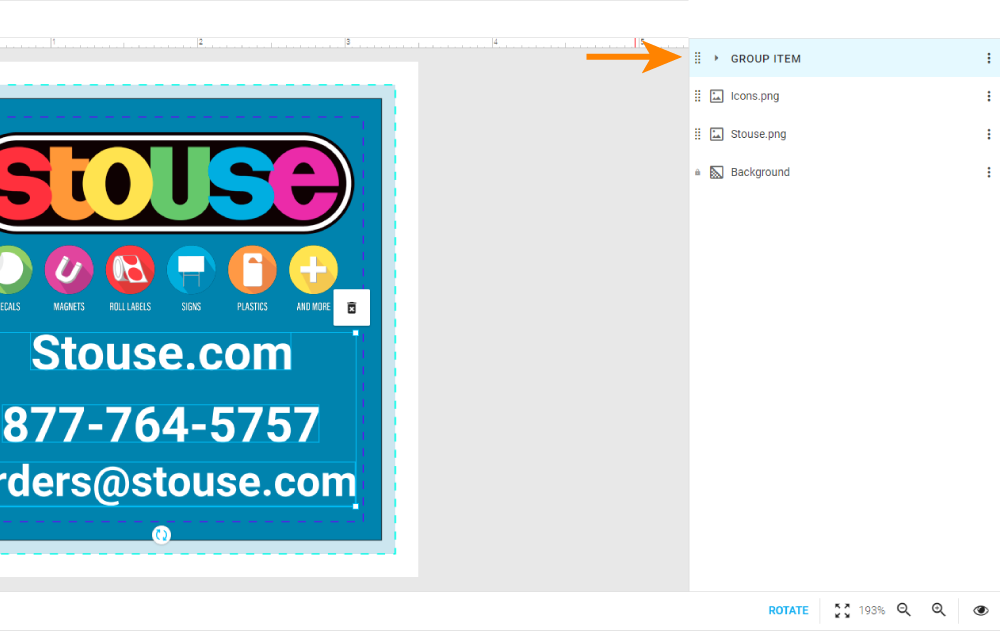
5. To ungroup layers, first make sure the grouped layer is selected. Next, click the ungroup icon (see image) that appears in the top menu. You can also ungroup the layer by clicking the three dots to the right of the group layer name and selecting “ungroup”.
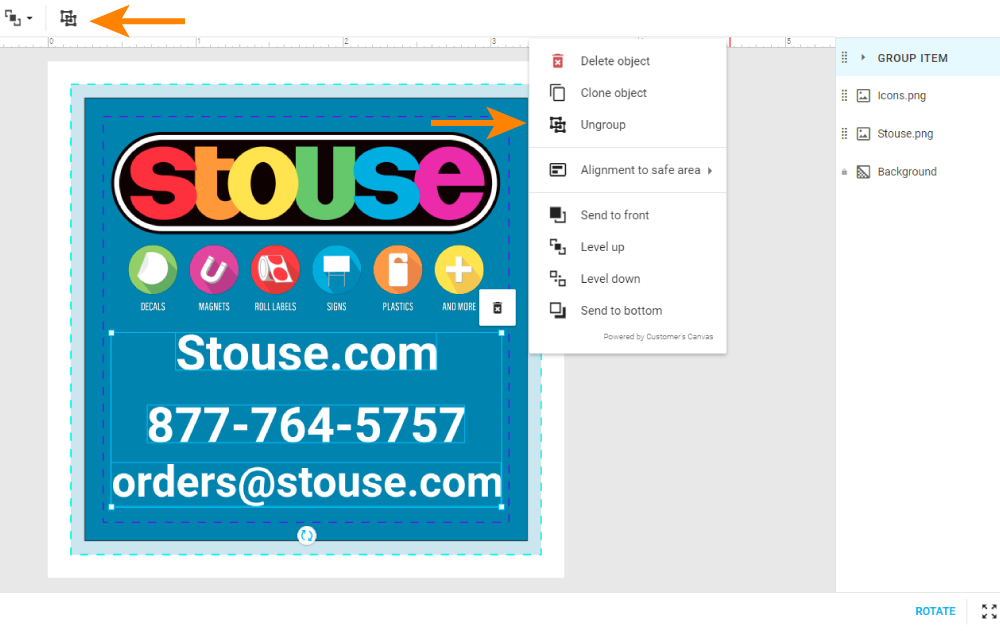
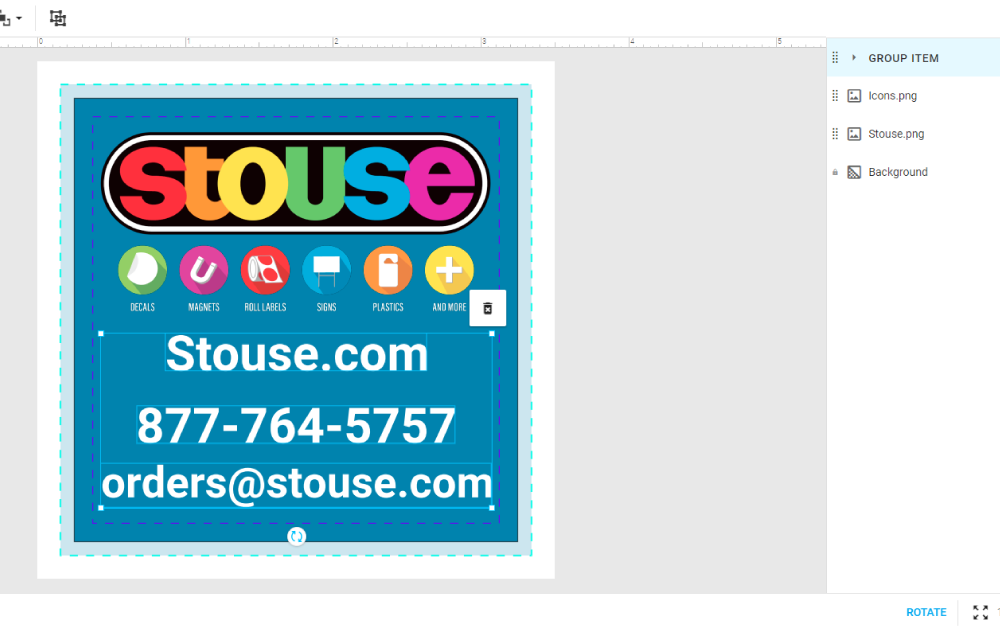
6. You can scale, rotate, and move layers at the same time while they are grouped together. Click on one design element in the group and every layer in the group will be selected at once.
- To make changes to a single layer that’s in a group, double click on the design element in the design tool.
Video instructions
Review the step by step instructions below or scroll down to view a short video
1. After uploading your art file, click and drag the handles on each corner of the image to scale it, using the safety lines as a guide to ensure your art meets the bleed requirements and important design elements are not outside the caution zone.
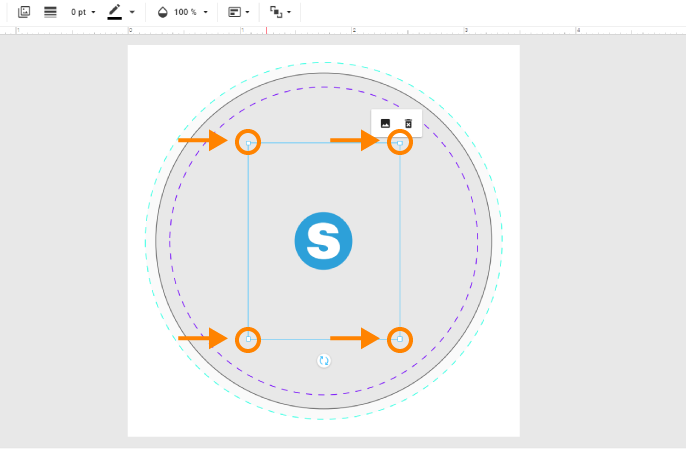
2. If your artwork is saved on a large background, making it hard for you to scale your design within the tool, here are some tips to help! Follow the steps below based on your file type.
PDF, AI, EPS, or SVG File Types
1. After uploading your file, your art may be appear very small within the template. To make things easier, you can use the “zoom out” tool near the bottom right side of the design area.
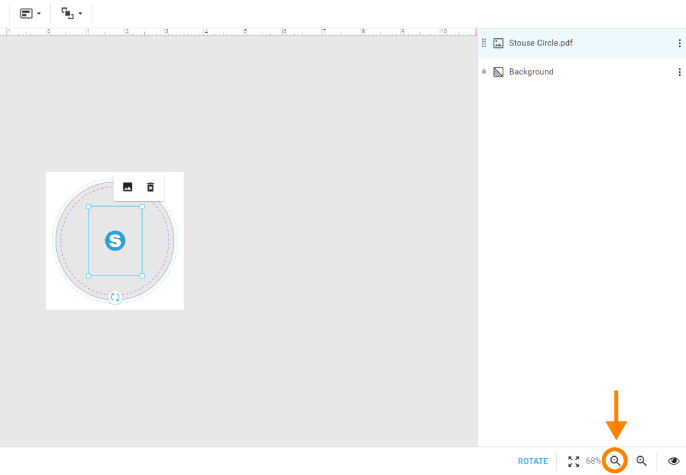
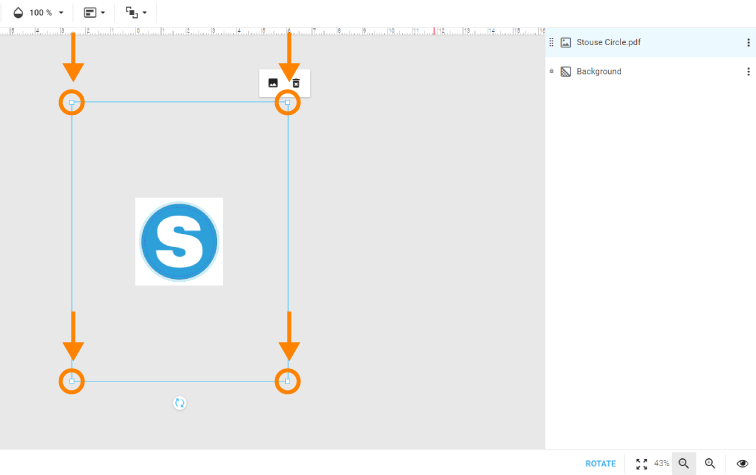
2. Once you have zoomed out, you can then use the handles in each corner to scale your art to fit within the template. As mentioned above, be sure your art fills the template, allows for enough bleed, and that all important design elements are within the caution zone. You can zoom in or out as needed to ensure that everything is correct.
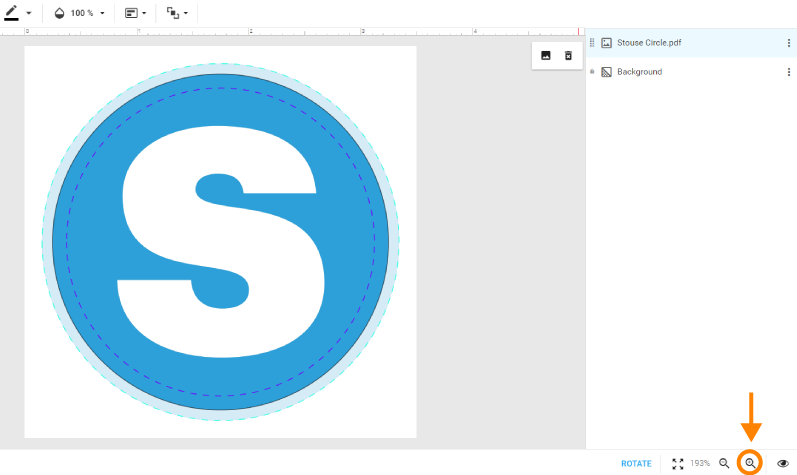
3. After you have scaled your file, use the “zoom in” tool to return to the original view and make any final adjustments.
PNG and JPG File Types
1. After uploading your file, your art may appear very small within the template. To make things easier, start by cropping your image to reduce the amount of dead space in your file. With your file selected, you will see a pencil icon appear. Select that icon to edit the artwork.
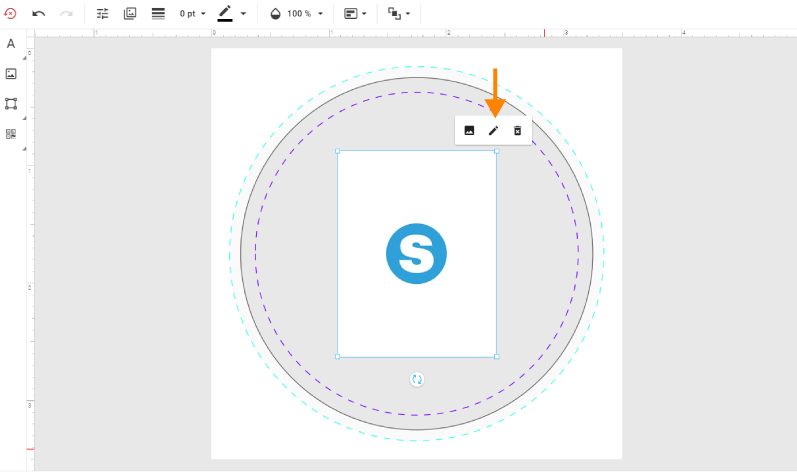
2. Once you are in the editing view, select “CROP”.
3. You will now see a crop window appear that you can adjust. Use the handles on the crop window to cut off any excess background space and focus in on your design. Once you’re satisfied with your crop, hit “APPLY”.
4. Next, click “SAVE” to lock in your changes and return to the design template. Note: If you no longer like the cropped artwork, you can click “REVERT” to return the file to its original state.
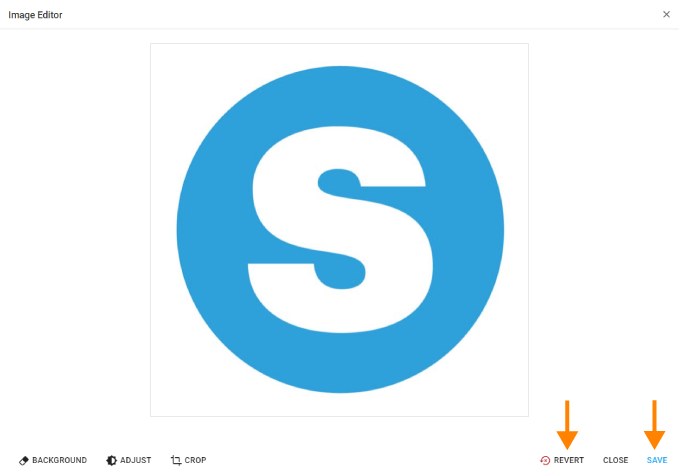
5. Once you’ve saved your final crop, you will return to the design template with your new image. You can then easily scale the artwork using the corner handles and position it within the template.
Video instructions